

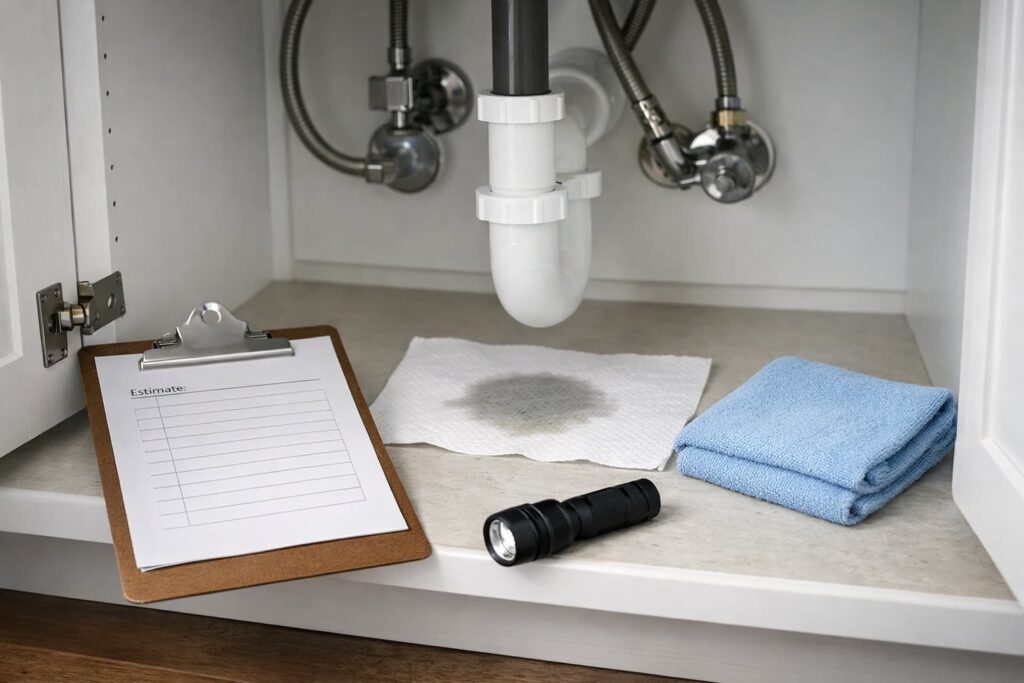
Water leak detection cost typically starts with a diagnostic visit around $150, and specialized hidden-leak work (like slab leak detection) is commonly about $150–$400—before repairs. Your total depends on where the leak is, how hard it is to access, and what tools are needed to pinpoint it with minimal damage.
Quick Checks First: Do safe DIY checks first, stop active leaks at the shutoff, then get quotes that clearly separate detection from repair.
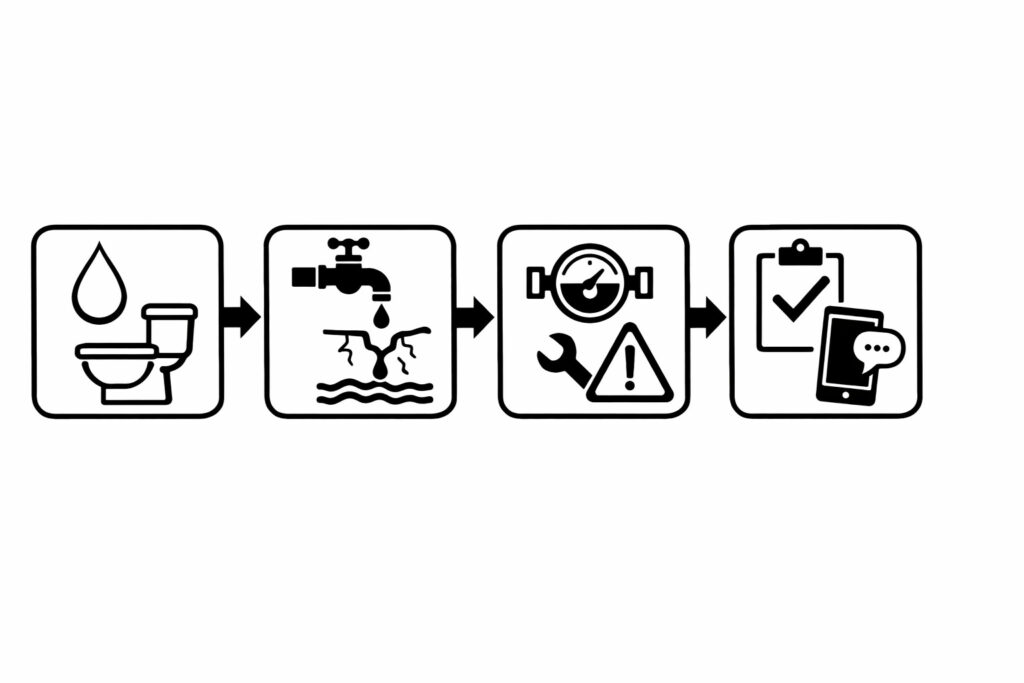
What “water leak detection” means (and what it doesn’t)
Leak detection is the process of finding and confirming the leak location so repairs can be targeted.
Detection often includes:
- Visual checks and fixture testing
- Checking for moisture spread patterns
- Non-destructive locating tools (varies by situation)
- A diagnosis or recommendation (scope varies)
Detection often does not include:
- The actual repair (pipe replacement, slab access, drywall work)
- Restoration (drying, flooring, mold work)
To avoid surprise charges, ask for pricing that separates detection from repair.
Water leak detection cost: realistic price ranges
Use these benchmarks to set expectations (your area and situation can change the total):
Basic diagnostic visit (finding/confirming a leak)
Many plumbers charge a diagnostic fee around $150 for a standard “find the leak” visit. See typical framing and examples in Angi: Angi
Slab leak detection (hidden leak under a foundation)
If the leak may be under a slab, detection can cost more due to limited access and specialized locating. Angi reports slab leak detection commonly runs $150–$400 (average around $280) in its slab leak cost breakdown: Angi — How Much Does Foundation Slab Leak Repair Cost
Detection may be billed separately from repair
Some providers treat locating the leak as a separate line item from repair work. HomeAdvisor notes diagnosing a leak location can add an additional charge (they cite about $100 as a common benchmark): HomeAdvisor — Plumbing Costs
What drives water leak detection cost up or down
Leak location and accessibility
- Lower cost (often): visible supply lines, under-sink leaks, toilets, accessible shutoffs
- Higher cost (often): behind tile, inside walls/ceilings, under slab, buried yard lines
Symptoms: obvious vs. “mystery” leaks
- If there’s clear dripping or visible staining, locating can be faster.
- If the only sign is a higher bill or intermittent dampness, the process can take longer.
Tools and methods used (why “hidden leak” detection costs more)
Depending on symptoms, a pro may use:
- Infrared + moisture checks to track moisture intrusion patterns (often paired with moisture meters). For a clear explanation of how IR is used in moisture investigations, see InterNACHI — IR Cameras: Inspecting for Moisture Intrusion.
- Acoustic locating approaches used in water systems for pressurized/buried lines. For technical context on acoustic survey methods, see National Research Council Canada publication page.
Urgency (after-hours calls)
Emergency response (nights/weekends) commonly costs more than a scheduled daytime visit.
Whether the diagnostic fee is credited toward repair
Some companies apply a diagnostic fee toward the repair if you approve the work. Others do not. Ask before dispatch.
What to expect during a professional leak detection visit
A typical leak detection appointment usually starts with a quick interview (what you noticed, when it happens), then a systematic check of the most likely sources. Depending on your symptoms, the pro may:
- Inspect visible supply lines, shutoffs, fixtures, and appliance connections
- Verify whether water use continues when everything is off (meter/pressure checks)
- Use non-destructive tools to narrow the leak area before any opening is suggested
- Recommend the next step: targeted repair, additional testing, or a specialist if needed
Before work begins, ask what the fee covers (detection only vs. detection + repair) and whether you’ll receive a written summary or marked location.
Safe next steps before you call (so you may pay less)
Step 1: Do a quick whole-home leak check
Start with a structured checklist to rule out common culprits like toilets and fixtures. Use the EPA WaterSense — Detect and Chase Down Leaks Checklist.
What to write down for the plumber
- When it started (and whether it’s constant or intermittent)
- Where you see staining, dampness, warping, or odors
- Which fixtures/appliances are closest to the symptoms
- Any recent work (appliance install, toilet replacement, remodel)
Video (DIY leak checks)
This EPA WaterSense video helps you visually follow the same DIY-first checks recommended above.
Quick prep checklist (can save time on-site)
Before the appointment, do these simple things if you can do them safely:
- Clear access to under-sink cabinets, the water heater, and the washer/dishwasher hookups
- Locate your main shutoff and water meter (don’t force stuck valves)
- Take a few photos of visible damage or staining (include wide + close-up)
- Write down any patterns (only when the washer runs, only overnight, only during showers, etc.)
- Keep pets and kids away from the work area
Step 2: If the water bill jumped, confirm whether water is running when “everything is off”
A simple check using your water meter can help determine whether you have continuous flow.
Video (water meter check for hidden leaks)
This utility-made video shows how to use a residential water meter to spot continuous flow.
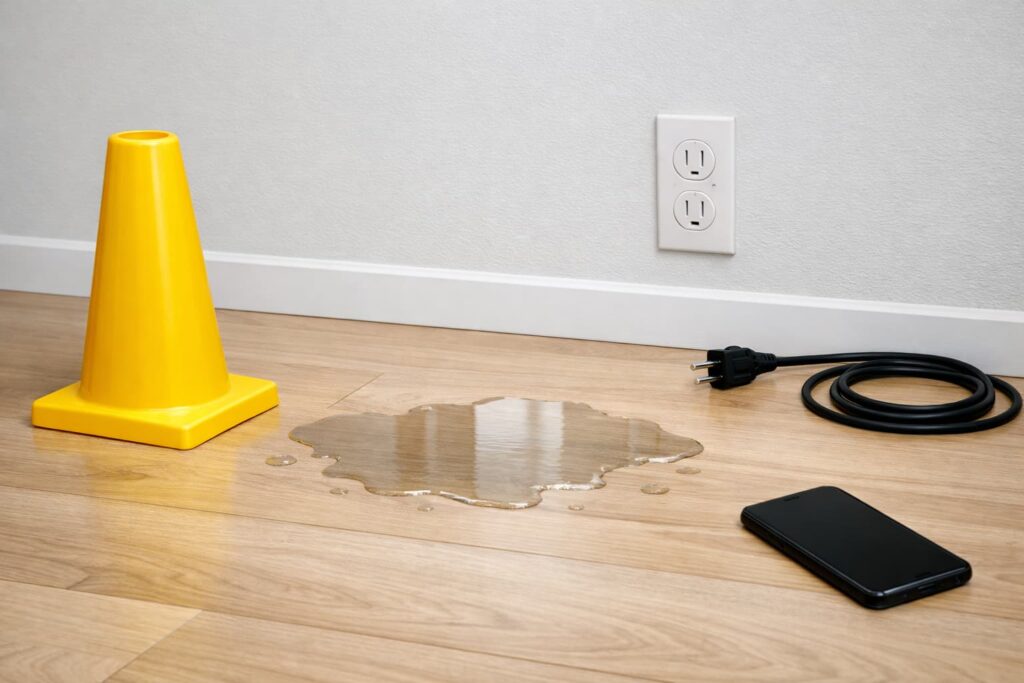
Step 3: If water is actively leaking, stop the flow first
If water is actively leaking, shutting off the supply safely is the priority. Emergency guidance that includes shutting off your home’s water supply is covered in American Red Cross — Food and Water in an Emergency.
Video (shut off water at the meter)
This walkthrough helps you understand meter shutoff basics for “stop the bleeding” situations.
Step 4: Avoid “guess-and-cut” openings
Cutting into walls or floors without confirmation can multiply repair costs. If the leak is hidden, professional locating may reduce unnecessary damage.
Troubleshooting flow: symptom → likely cause → safe check → next step
Higher-than-normal water bill
- Likely causes: silent toilet leak, dripping fixture, hidden line leak
- Safe check: do the WaterSense checklist and basic fixture checks
- Next step: schedule detection if nothing obvious appears
Damp drywall, bubbling paint, musty odor
- Likely causes: supply/drain leak in wall, fixture seal leak, intrusion from outside
- Safe check: look for the nearest plumbing connection or fixture first
- Next step: call a plumber; consider non-destructive locating before opening large areas
Pooling water or active flow
- Likely causes: burst supply line, failed connector, appliance hose issue
- Safe check: shut off water supply; keep people away from wet electrical areas
- Next step: call a licensed plumber immediately
Suspected slab leak (warm spot, running-water sound, unexplained damp floor)
- Likely causes: pressurized line leak under slab
- Safe check: limit water use; do not chip concrete
- Next step: schedule specialized detection (often priced higher than basic visits)
How to compare leak detection quotes (without getting burned)
Ask these questions before the tech arrives:
- Is this quote for detection only, or detection + repair?
- Is there a diagnostic fee, and is it credited toward repair if I approve the work?
- What’s included: written findings, photos, marked location, etc.?
- If opening a wall/floor is needed, how do you confirm the spot first?
- What changes the price: after-hours, multiple leak sites, hard access?
A simple way to keep quotes “apples-to-apples” is to request:
- Standard diagnostic visit price
- Specialized locating price (if slab/buried line is suspected)
- Repair estimate after detection is confirmed
Quote red flags to watch for
Be cautious if a company:
- Won’t separate detection from repair pricing
- Pushes immediate demolition (“we have to open a big area first”) without explaining how they’ll narrow the location
- Refuses to describe what the diagnostic fee includes
- Gives a firm price without asking where the symptoms are or what you’ve already checked
Who to call: plumber vs. leak detection specialist vs. restoration company
- Licensed plumber: Best starting point for most homes—fixtures, visible piping, appliance connections, and many hidden leaks.
- Leak detection specialist: Helpful when the leak is hard to locate (suspected slab, buried line, intermittent leaks) and you want more precise non-destructive locating.
- Water damage/restoration company: Consider when you already have significant wet materials (soaked drywall, flooring, insulation) and need drying help after the source is stopped.
If you’re unsure, start with a licensed plumber and ask whether a specialist is recommended for your specific symptoms.
STOP / CALL A PRO: safety boundaries you shouldn’t cross
Stop DIY and call a licensed plumber (or emergency help when needed) if:
- Water is near outlets, panels, wiring, or powered appliances
- Ceilings are sagging/bulging or there’s structural concern
- You suspect a slab leak or buried main line leak
- You smell burning, see scorch marks, or breakers trip repeatedly
- You have extensive moisture intrusion you can’t quickly control
- You suspect the leak involves drain/sewer water (foul odor, dark water, or water backing up) rather than clean supply water—treat it as a higher-risk situation and call a pro
For utility shutoff readiness and safety basics, see NARUC — Utilities 101: The Importance of Shutting Off and Unplugging.
Why professional leak detection is often worth it
Professional detection can pay off when:
- The leak is hidden and you want to minimize demolition
- You suspect slab or buried lines
- DIY checks didn’t reveal the source
- You want faster confirmation before repairs start
FAQs
1) What is the average water leak detection cost?
A common starting point is a diagnostic visit around $150, but totals vary by location and complexity, and hidden leaks can cost more to locate.
2) Does leak detection include repair?
Often not. Detection is locating/confirming the leak; repairs and restoration are typically separate charges.
3) Is the leak detection (diagnostic) fee credited toward the repair?
Sometimes. Some companies apply the diagnostic fee toward the repair if you authorize the work, while others treat detection as a separate service. Ask this before the appointment and get it in writing on the estimate if possible.
3) Why does slab leak detection cost more?
Slab leaks are harder to access and may require specialized locating to avoid unnecessary concrete removal.
4) Can I lower my leak detection cost?
Sometimes. Do safe DIY checks first, document symptoms, clear access to shutoffs, and avoid cutting walls/floors without confirmation.
5) What should I do first if water is actively leaking?
Shut off the water supply if you can do so safely, keep people away from wet electrical areas, and call a licensed plumber.
6) Is a higher water bill always a leak?
Not always, but it’s a common sign. A water-meter check combined with fixture/toilet checks can help confirm whether water is running when it shouldn’t be.
7) Are leak detection devices worth considering?
They can be helpful for early warning and automatic shutoff in some homes. For a consumer overview of leak detector system types and considerations, see Consumer Reports — Best Water Leak Detector Systems.
Conclusion
Water leak detection cost usually starts with a diagnostic fee and rises when the leak is hidden, hard to access, or suspected under a slab. Start with safe DIY checks, shut off the water quickly for active leaks, and get quotes that clearly separate detection from repair. When there’s any electrical risk or major water flow, stop and bring in a licensed pro.
Sources / References
- EPA WaterSense — Detect and Chase Down Leaks Checklist (PDF)
- Angi
- Angi — How Much Does Foundation Slab Leak Repair Cost
- HomeAdvisor — Plumbing Costs
- InterNACHI — IR Cameras: Inspecting for Moisture Intrusion
- National Research Council Canada publication page
- American Red Cross — Food and Water in an Emergency (PDF)
- NARUC — Utilities 101: The Importance of Shutting Off and Unplugging (PDF)
- Consumer Reports — Best Water Leak Detector Systems