

The fastest safe way to clean a washing machine detergent drawer is to remove it using the built-in release tab/lever, wash the drawer and inserts with warm water + mild dish soap, scrub crevices with a soft brush, then wipe the drawer housing (recess) and reinstall everything fully seated. This keeps it effective without harsh chemicals—and helps stop smells from coming back.
Safety First (Read Before You Start)
- If you’ll be reaching deep into the dispenser area or using lots of water, unplug the washer to reduce shock risk. Keep water away from controls and outlets.
- Wear gloves if you have sensitive skin.
- Ventilate the room.
- Never mix cleaning products. If you choose to disinfect with bleach (optional), follow label directions and safety rules—especially the “don’t mix” warning from the CDC — How to Safely Clean and Disinfect with Bleach.
What You’ll Need (No Harsh Chemicals)
- Warm water
- Mild dish soap
- Soft brush (old toothbrush)
- Microfiber cloth or soft rag
- Optional: bowl/sink for soaking
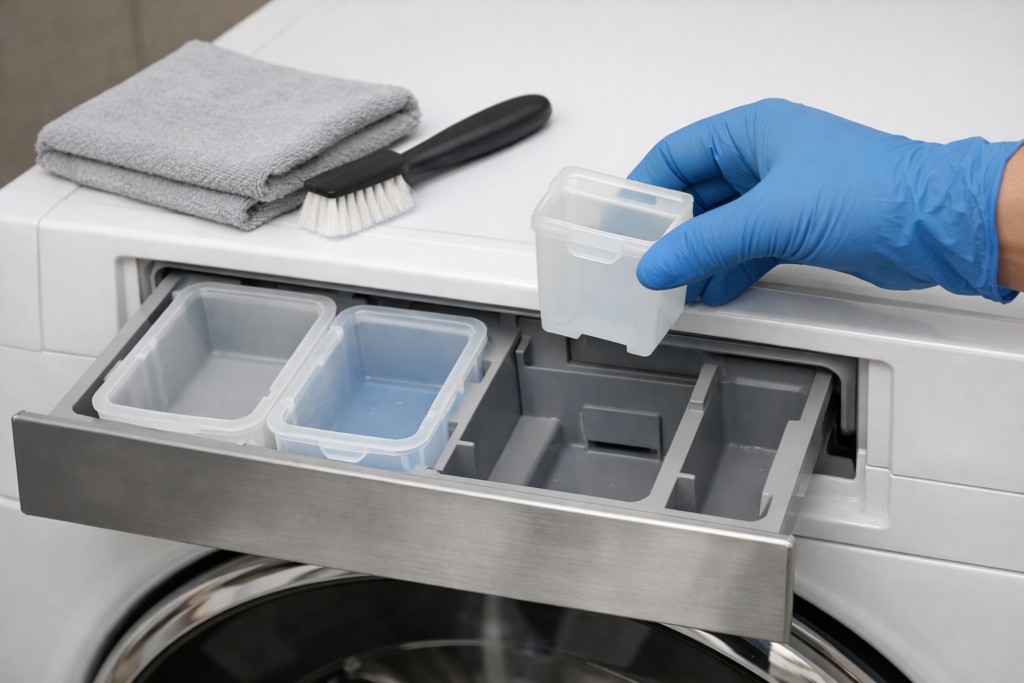
Quick map of the drawer (so you clean the right parts):
Most detergent drawers have separate compartments for detergent, fabric softener, and sometimes prewash. Many also include a removable insert and a softener siphon cap (a small cap/cover that helps the softener “siphon” out). If you’re not sure what’s removable, don’t force it—check your brand’s support page or your model manual.
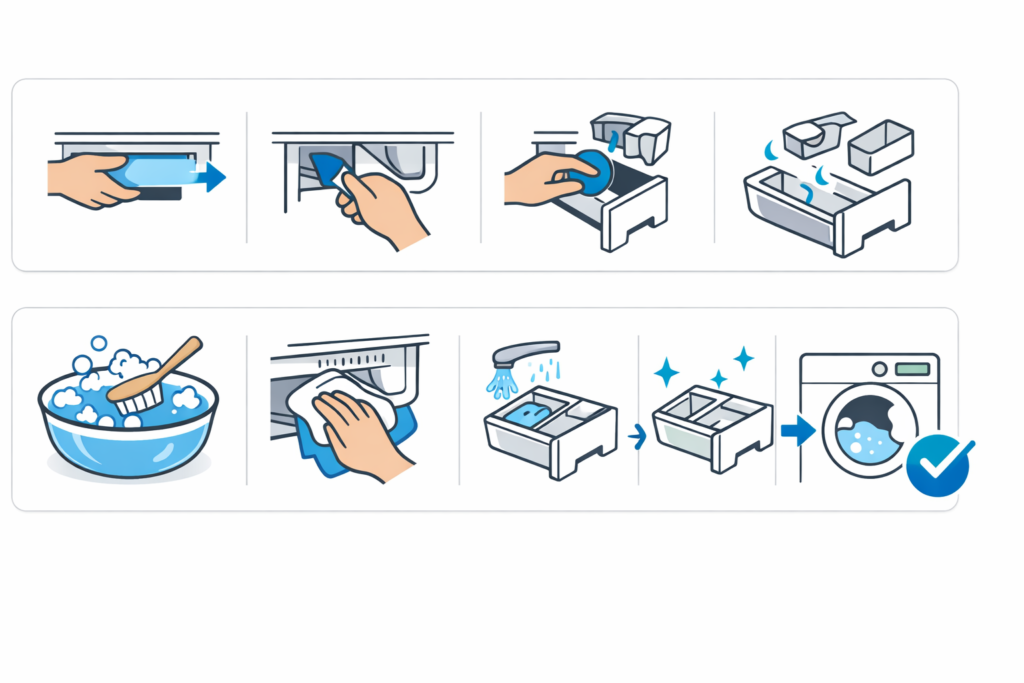
Step-by-Step: How to Clean Washing Machine Detergent Drawer
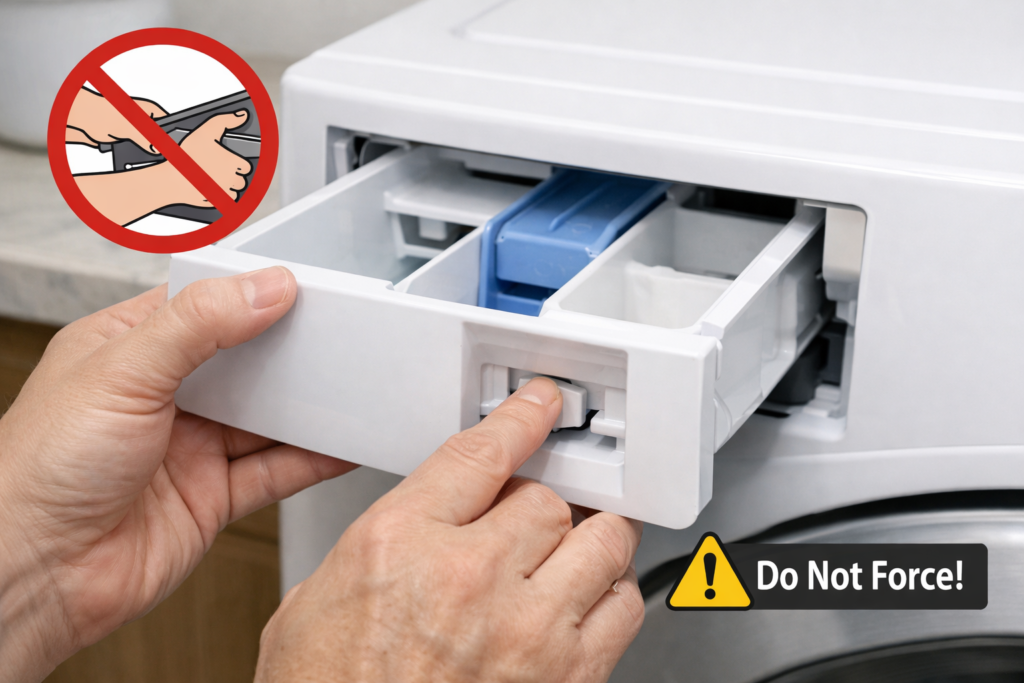
Step 1: Remove the drawer (don’t force it)
Most drawers stop partway out and require a release tab/lever/button to remove completely.
Note: Drawer designs vary by model (even within the same brand). If you don’t see an obvious release, don’t force it—use your model’s manual/support instructions.
- Pull the drawer out until it stops.
- Find the release:
- Some models use a PUSH button.
- Some use an internal release lever.
- Some top-load designs lift to release (depends on drawer type).
Use your brand’s official guidance for the exact release style:
- Whirlpool — How to Clean a Front Load Washer Dispenser (Drawer)
- LG Washer Dispenser Maintenance
- Samsung Support — How to Clean the Detergent Drawer
- GE Appliances Support — How to Clean the Dispenser Drawer
If it feels stuck: stop pulling harder. Dried detergent can glue drawers in place, but forcing it can break rails/clips.
YouTube (visual help for safe removal + cleaning)
Shows the release-lever removal, brushing/rinsing, and reinstall steps so readers don’t force the drawer.
Step 2: Remove inserts and siphon caps (if present)
Many drawers have removable pieces (compartments, inserts, siphon caps).
- Lift out inserts carefully.
- Take a quick photo before removing parts so reassembly is foolproof.
Why it matters: if siphon parts aren’t seated correctly, softener may not dispense or may leave residue.
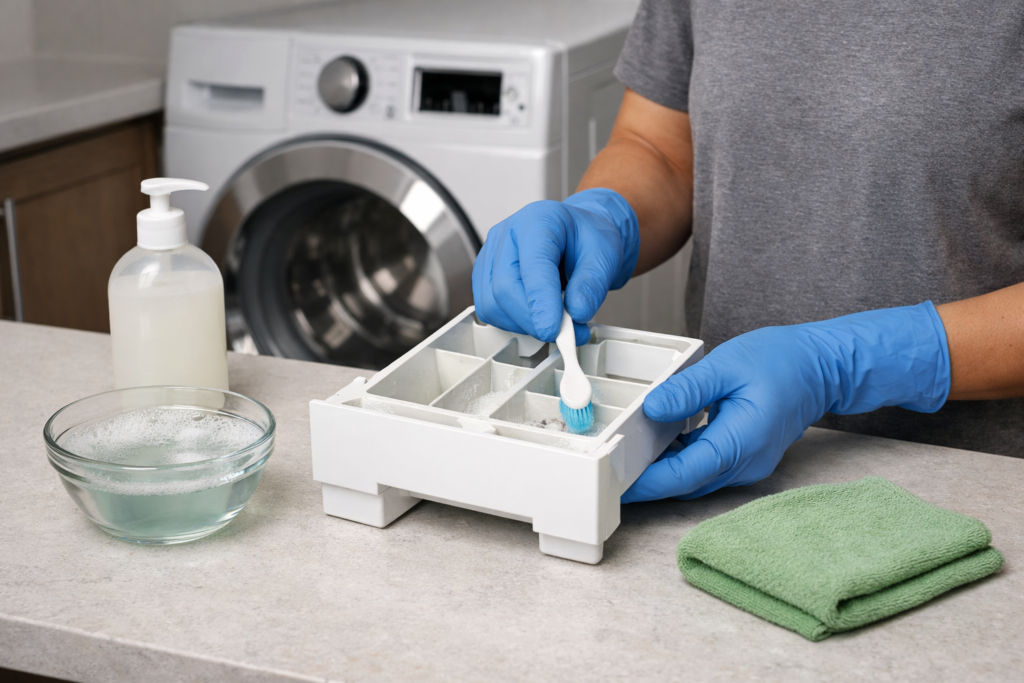
Step 3: Wash and scrub the drawer (fast + safe)
- Rinse the drawer under warm water.
- Add a small amount of mild dish soap.
- Scrub crevices and corners with a soft brush:
- around compartment edges
- under lips/ledges
- inside siphon channels and small ports (gently)
If buildup is thick: soak the drawer in warm soapy water, then scrub again.
Avoid damage:
Skip abrasive pads, steel wool, and hard scrapers—scratches make residue stick faster and can crack plastic over time. A soak + soft brush is safer and usually works.
Step 4: Clean the drawer housing (the “smell comes back” spot)
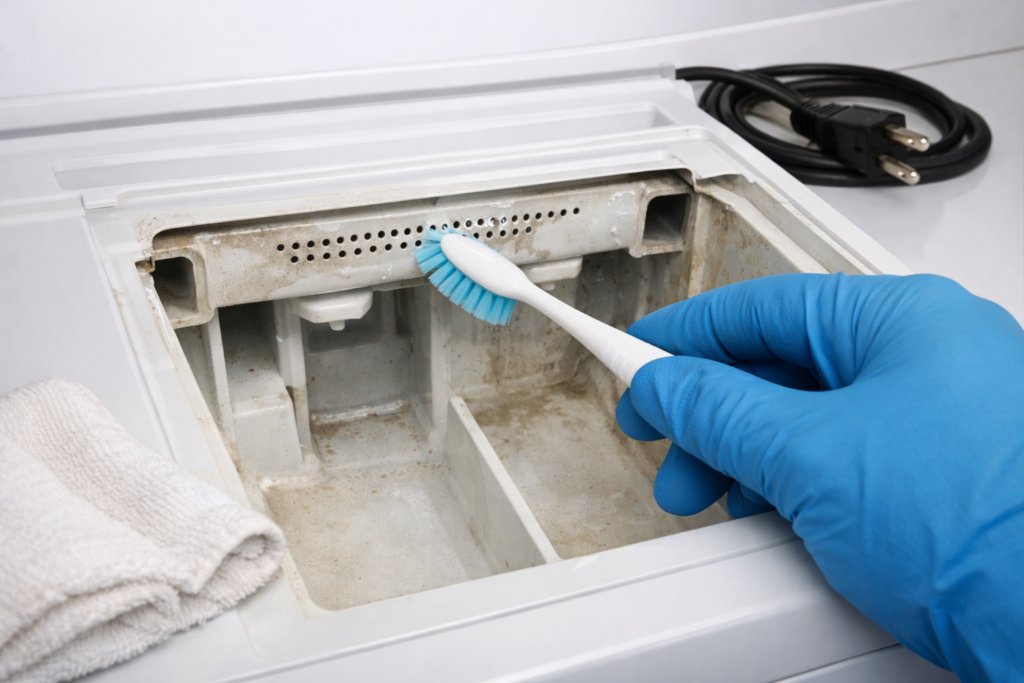
This is the compartment the drawer slides into—and it’s where gunk often hides.
- Wipe reachable surfaces with a damp, soapy cloth.
- Use a soft brush for crevices and corners.
Don’t miss the water inlet area:
If you can see small spray holes/nozzles where water enters the dispenser, gently loosen buildup with your soft brush and wipe. Don’t poke hard with sharp tools—just remove the residue you can reach safely.
- Wipe again with a clean damp cloth to remove loosened residue.
- Dry with a cloth if you can.
Avoid digging into areas you can’t see clearly or that require disassembly.
Step 5: Rinse, dry, and reinstall everything fully seated
- Rinse drawer parts thoroughly.
- Towel-dry.
- Reinstall inserts/caps firmly.
- Slide the drawer back in smoothly.
Note: some brands warn against using a dishwasher for certain removable dispenser parts—hand-washing is the safer default if your manual doesn’t explicitly allow dishwashers.
Quick test (recommended):
After reinstalling the drawer, run a short rinse cycle (or the quickest cycle that uses water) and confirm the drawer compartments empty normally and there’s no leaking around the drawer area.
Quick “Fast Clean” Routine (5 minutes)
Use this when you notice light residue but no heavy gunk:
- Remove drawer
- Rinse + quick scrub with warm soapy water
- Wipe the housing
- Dry and reinstall
This prevents the “gel layer” buildup that takes longer later.
If the Drawer Is Stuck: Safe Troubleshooting (No Pry Tools)
Try this first
- Pull to the stop point.
- Press the release tab/lever firmly.
- Wiggle gently while holding the release.
If it still won’t come out
- Don’t pry with a screwdriver (easy to crack plastic or rails).
- Re-check the brand’s official release method.
- If it feels jammed or grinding, stop and call appliance service (broken rails can turn a simple clean into a repair).
If You See Black Gunk or a Musty Smell
This is commonly residue + moisture in:
- drawer corners and inserts
- softener siphon parts
- the housing/recess (most frequent “return smell” source)
Do this:
- Clean drawer + inserts + housing in the same session.
- Rinse thoroughly and reinstall correctly.
- If your setup allows, leave the drawer slightly open between loads so it can dry.
Stop and call a pro if growth extends beyond the accessible housing area or you’d need to remove panels to reach it.
Special Case: Auto-Dispense Systems (Load & Go, ezDispense, etc.)
Auto-dosing washers can have different cleaning steps than a standard drawer. Follow the manufacturer’s system-specific instructions.
YouTube (official auto-dispense cleaning walkthroughs)
Whirlpool’s official walkthrough for cleaning a Load & Go-style dispenser system.
LG’s official ezDispense-style cleaning video that matches the “follow your system’s steps” guidance.
How Often to Clean the Detergent Drawer
There isn’t one perfect schedule for every home. Clean sooner if you notice:
- detergent/softener not dispensing well
- visible residue
- musty smell near the drawer
- clumps or gooey buildup
A short, regular rinse-and-scrub is usually easier than occasional deep cleans.
How to Keep the Detergent Drawer Cleaner Longer (Prevention Tips)
- Use the right amount of detergent (overdosing makes buildup worse).
- If your setup allows, leave the drawer slightly open between loads so it can dry.
- Wipe up spills right away—detergent that dries in place turns into “glue.”
- If you regularly use fabric softener, check the softener area more often since it can leave sticky residue.
Stop and Call a Pro (Non-Negotiable)
Stop and contact a qualified appliance technician if:
- you see leaks into the cabinet or behind panels
- there’s a burning/electrical smell or unusual heat
- the drawer is cracked/warped or won’t seat correctly
- fixing the issue would require removing covers, accessing wiring, or disassembling the dispenser plumbing
FAQs
1) How to clean washing machine detergent drawer without harsh chemicals?
Use warm water and mild dish soap, scrub with a soft brush, clean the housing/recess, rinse well, and reinstall parts fully seated.
2) Why does my detergent drawer get slimy or smelly?
Moisture plus detergent/softener residue builds up in corners and siphon parts—especially in the drawer housing where water flows.
3) How do I remove a washing machine detergent drawer that won’t come out?
Pull it out until it stops, then use the built-in release tab/lever/button (often labeled PUSH on some models). Don’t force it—use your brand’s official steps.
4) Can I use bleach to clean the detergent drawer?
If you choose to disinfect, follow product label directions and safety rules—and never mix bleach with other cleaners. For most routine buildup, warm soapy water is enough.
5) What if fabric softener doesn’t dispense after cleaning?
Recheck that siphon caps/inserts are installed correctly and fully seated, then test again. Mis-seated inserts are a common cause.
6) Do I need to run a washer clean cycle after cleaning the drawer?
Not always, but it can help flush residue from the dispenser area. If your washer has a manufacturer-recommended clean cycle, follow your model’s instructions.
Conclusion
A clean detergent drawer is mostly about removal + gentle scrubbing + cleaning the housing—not harsh chemicals. Keep it simple, don’t force stuck parts, and reassemble inserts carefully so dispensing works correctly. If anything points to leaks, electrical issues, or required disassembly, stop and call a pro.