

If your pipes bang when the washer, dishwasher, ice maker, toilet, or a fast-closing faucet shuts off, water hammer arrestor installation is often the right fix when the arrestor is installed close to the quick-closing valve and matched to the connection type. In many homes, the job is simple at an accessible threaded fixture connection. Once the piping method changes to soldered copper, CPVC, PEX, hidden branch lines, or house-wide hammer noise, the safer move is to stop and bring in a licensed plumber.
Quick Checks First
- Install the arrestor as close as possible to the fixture or appliance causing the banging.
- A basic threaded fixture connection is often homeowner-friendly.
- Match the arrestor to the exact connection type.
- Tighten carefully and check for leaks before putting the fixture back into normal use.
- If the hammer affects multiple fixtures, the issue may be branch-line placement, pipe support, pressure regulation, or a broader plumbing problem.
What a water hammer arrestor does
A water hammer arrestor helps absorb the pressure shock that happens when a quick-acting valve closes suddenly. That shock can create the loud bang many homeowners hear in supply piping after a washing machine valve snaps shut or a dishwasher stops filling.
The plumbing guidance referenced in the IAPMO UPC Section 609.10 proposal text says systems with quick-acting valves should be provided with water hammer arresters, and those devices should be installed as close as possible to the quick-acting valves. That lines up with manufacturer guidance from Oatey, Sioux Chief, and Watts.
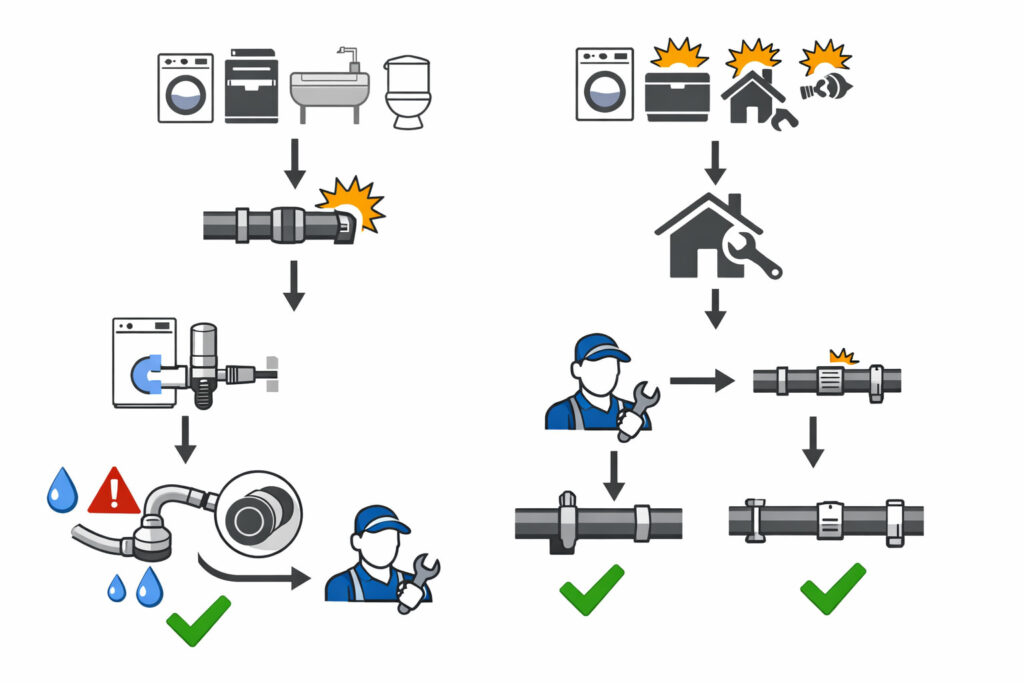
When water hammer arrestor installation makes sense
Water hammer arrestor installation usually makes sense when the bang happens right after one specific fixture or appliance shuts off.
Common examples include:
- washing machine supply valves
- dishwasher fill valves
- refrigerator ice maker supply lines
- toilet fill valves
- some quick-closing faucets or appliance valves
A fixture-side arrestor is often a practical first step when the noise is clearly tied to one appliance or one fixture. Oatey’s project guide presents this as a common residential fix for banging pipes.
What to check before blaming water hammer
Before buying an arrestor, do two quick checks.
First, confirm which fixture causes the noise. Run the washer, dishwasher, ice maker, toilet, or faucet one at a time and listen for the exact moment the bang happens. If the noise clearly follows one quick-closing valve, a nearby arrestor is a more likely fix.
Second, look for loose or poorly supported piping in any accessible area, such as under sinks, in a basement, or near a laundry box. Oatey notes that properly securing piping is also important when solving water hammer. If the noise happens at several fixtures or the pipes visibly move when water shuts off, the issue may be larger than one missing arrestor.
Safety first before you start
Before starting any water hammer arrestor installation:
- turn off the local water supply valve
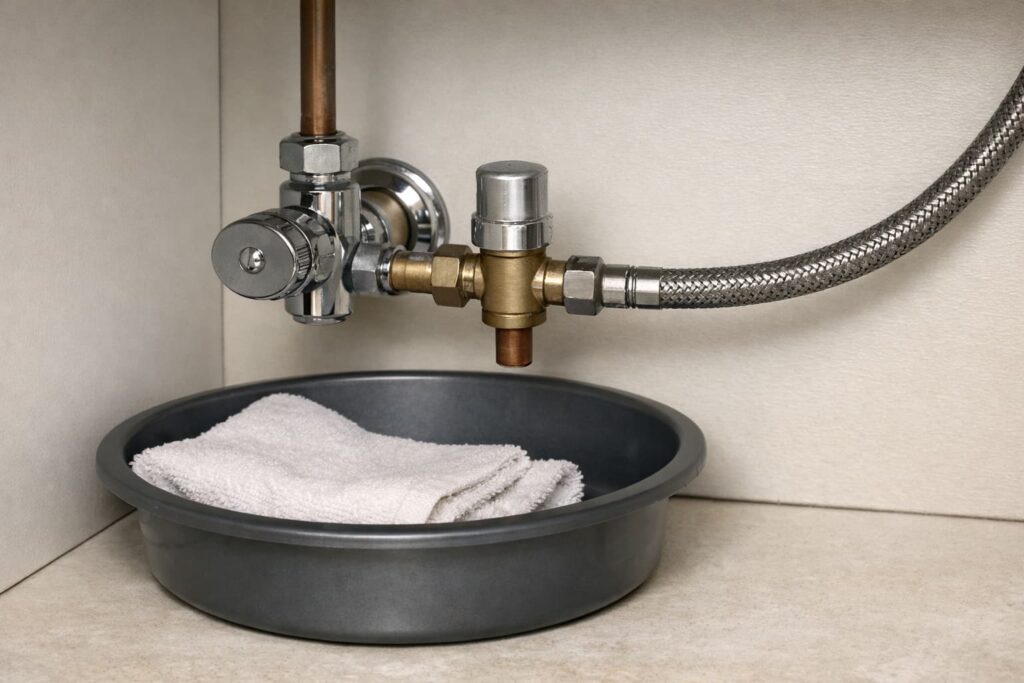
- keep a towel, shallow pan, or bucket below the connection
- dry the area before reconnecting anything
- confirm the shutoff valve actually works before loosening the supply line
This is not a project to push through if the valve leaks, the connection is corroded, or the piping method is unfamiliar.
Stop and call a pro if:
- the hammer happens at multiple fixtures around the house
- the piping is inside walls or ceilings and likely needs branch-line work
- the job requires soldering, press fittings, CPVC solvent work, or PEX tools and methods you do not use safely
- the shutoff valve will not fully close
- you see active leakage, corrosion, pipe movement, or damaged supports
- the noise continues after a proper fixture-side arrestor install
That boundary is consistent with the product-specific installation limits shown in Sioux Chief’s HydraRester instruction sheet and with Watts installation guidance reminding installers to follow local code.
Check these things before you buy an arrestor
Not every water hammer arrestor installs the same way. Some are simple threaded models that fit accessible fixture shutoff connections. Others are designed for sweat, press-fit, CPVC, PEX crimp, or PEX expansion installations. Sioux Chief’s instruction sheet separates these connection methods because they do not share the same installation steps or risks.
Before buying, confirm:
- the exact connection type at the fixture
- whether the arrestor is intended for that connection method
- whether you need a straight connection or a tee-style arrangement
- whether the noise is limited to one fixture or affects a longer branch line
- whether local plumbing code has special requirements
Watts and Sioux Chief both make the same bigger point: local code and the actual piping layout matter.
Also check that the arrestor is an approved mechanical water hammer device for plumbing use. The UPC language referenced by IAPMO points to recognized standards such as ASSE 1010, IAPMO IGC 168, and PDI-WH 201, depending on the product type. That does not replace local code, but it is a useful screening step when comparing products.
Where to install a water hammer arrestor
In a simple residential setup, the best place is usually near the appliance or fixture causing the shock. That is the clearest through-line across the code language and manufacturer instructions.
Oatey shows typical fixture-side installation at the stop valve. Watts says to install the arrestor as close as possible to the source of shock.
For longer branch lines
This is where sizing and placement become more technical. According to Sioux Chief’s sizing and placement guide:
- on branch lines 20 feet or less, place one arrester at the end of the branch line within 6 feet of the last fixture served
- on branch lines over 20 feet, each 20-foot section is calculated separately, with an arrester at the end of each section within 6 feet of the last fixture served in that section
For many homeowners, that is the point where a simple add-on install turns into a design and code question rather than a quick fix.
Can a water hammer arrestor be installed horizontally or vertically?
Often, yes. Oatey says its arrestor can be installed in any directional position, and Sioux Chief says its HydraResters may be installed at any angle.
That means orientation is usually flexible. The more important question is whether you have the correct fitting style and the right location.
Step-by-step water hammer arrestor installation for a basic threaded fixture connection
This section covers the safest common DIY scenario: an accessible threaded arrestor at a fixture shutoff or similar threaded connection.
1) Shut off the water
Turn off the local shutoff valve feeding the fixture or appliance. If the valve does not shut the water off fully, stop there. A bad shutoff valve should be repaired before you continue.
Oatey’s Quiet Pipes Hammer Arrestor instruction guide starts with shutting off the water supply to the valve.
2) Disconnect the supply line
Place a shallow pan or towel below the connection. Loosen the supply line and catch the small amount of water left in the line. Dry the area before reconnecting anything.
Oatey’s project guide recommends using a bucket or shallow dish and drying the area before moving on.
3) Thread the arrestor onto the valve or approved connection point
Hand-thread the arrestor first. Make sure the connection starts cleanly and does not bind. If the installation calls for a tee fitting, use the fitting arrangement approved for that product and connection type.
Oatey shows a basic threaded install sequence and notes that some setups use a tee fitting.
4) Reconnect the supply line
Reconnect the supply hose to the arrestor and then to the fixture or appliance as needed by the setup. Keep the supply line aligned so you are not forcing or twisting the connection.
5) Tighten carefully
Snug the connection without overtightening. This is one of the easiest ways to create a leak or damage the fitting.
Oatey says not to overtighten. Sioux Chief says to apply the wrench to the adapter hex, not the arrester barrel. Watts product instructions also warn installers to use the hex flats rather than damaging the body.
6) Turn the water back on slowly and check for leaks
Open the shutoff slowly. Watch every connection point. If you see even a small drip, shut the water back off and correct it before using the fixture normally.
Oatey’s instruction guide ends with turning the water back on and checking for leaks.
Quick symptom-to-next-step guide
Banging at one appliance only
Most likely next step: inspect that fixture first and install the arrestor close to that valve if the connection type supports it.
Banging at several fixtures
Most likely next step: stop treating it like a single add-on problem. You may be dealing with a branch-line placement issue, pipe support problem, pressure issue, or a broader plumbing design problem.
Leak after installation
Most likely next step: shut the water off, check for the wrong fitting type, a damaged seal, cross-threading, or overtightening. If the connection still drips after a careful reinstall, inspect the supply hose washer or seal and the hose itself for wear or damage instead of tightening harder.
Noise improved but did not disappear
Most likely next step: check pipe support and placement. Oatey notes that properly securing piping is also important in solving water hammer.
A realistic expectation before you install one
A water hammer arrestor can work very well when the noise is tied to a quick-closing valve near the install location. But it is not a cure-all for every banging-pipe problem. If the real issue is loose piping, high pressure, poor branch-line placement, or a system-wide hammer problem, the arrestor may reduce the noise without eliminating it completely.
Common mistakes to avoid
Installing the arrestor too far from the shock source
The arrestor works best near the quick-closing valve. A distant location may not control the shock well.
Using the wrong connection type
A threaded add-on arrestor is not interchangeable with sweat, press-fit, CPVC, or PEX models.
Overtightening
Too much force can damage fittings, seals, or the arrestor body.
Treating a house-wide problem like a one-fixture problem
If the noise shows up at several fixtures, one arrestor at one appliance may not be enough.
Ignoring local code
Manufacturer guidance is helpful, but local plumbing code controls the job.
Special caution for soldered, press-fit, CPVC, and PEX installations
This is where many DIY installs stop being simple.
Sioux Chief’s instruction sheet gives method-specific directions for sweat, press-fit, CPVC, PEX crimp, and PEX expansion styles. It also says not to overheat the arrester and not to braze.
That is a clear sign not to improvise. If your installation is not a straightforward threaded fixture connection, use the exact manufacturer instructions for that product or hire a licensed plumber.
Do you need one on both hot and cold lines?
Sometimes, yes. But this depends on the product and the application.
Watts product literature for certain applications says to install a shock arrestor on both hot and cold lines. That is useful manufacturer guidance, but it should not be treated as a universal rule for every arrestor and every layout.
When to stop and call a pro
Call a licensed plumber when:
- the water hammer affects multiple parts of the home
- the piping is hidden behind finished walls or ceilings
- the job requires soldering, pressing, solvent welding, or PEX installation methods you do not safely handle
- the shutoff valve leaks or will not shut off
- there is corrosion, damaged piping, or repeated leakage after a careful reinstall
- you suspect the real issue is high pressure, poor pipe support, or branch-line design
This is the line between a simple fixture-side install and a real plumbing diagnosis.
Helpful videos
For the basic fixture-side installation section
Included because it appears to come from Oatey and directly supports the simple fixture-style arrestor installation covered in this article.
Included because it is an official Oatey demo that helps explain where this type of arrestor is typically used and how it reduces banging pipes.
For placement and orientation
Included because it appears to come from Sioux Chief and supports the article’s placement and any-angle orientation guidance.
For appliance-specific examples
Included because it directly supports a common real-world use case: installing an arrestor at an appliance connection where quick-closing valves often cause banging.
FAQs
What is the best place for water hammer arrestor installation?
Usually, it is as close as possible to the quick-closing valve or fixture causing the shock.
Can I install a water hammer arrestor under a sink?
Yes, if you have an accessible compatible threaded connection and the arrestor is intended for that setup.
Does a water hammer arrestor have to go inside the wall?
No. Many common residential installs use an accessible arrestor at the fixture stop valve or appliance connection. In-wall or branch-line installations may be used in some plumbing layouts, but those are more likely to involve code, sizing, and access questions.
Can a water hammer arrestor be installed sideways?
Often yes, because many manufacturer-approved models can be installed in different orientations.
Will one arrestor fix water hammer everywhere in the house?
Not always. If the problem affects multiple fixtures or longer branch lines, one arrestor may not solve the full issue.
Do I need a plumber for water hammer arrestor installation?
Not always. A basic threaded fixture-side install may be manageable for a careful homeowner. More complex piping methods or hidden piping usually call for a licensed plumber.
Are water hammer arrestors required by code?
Code rules depend on the jurisdiction, but plumbing code language and manufacturer guidance both support using approved arrestors at quick-acting valves.
Conclusion
Water hammer arrestor installation is often a smart, practical fix when one fast-closing fixture is causing the noise and you have an accessible compatible connection. The safest approach is to install the right arrestor near the source of shock, tighten carefully, check for leaks, and stop when the project turns into branch-line design or specialty pipe work. Done the right way, it can quiet the system without turning a simple plumbing fix into a risky repair.