

In most cases, “how to fix a leaky faucet single handle” comes down to shutting off the water, removing the handle, and cleaning or replacing the cartridge (and sometimes cleaning the aerator). Start with a quick diagnosis so you don’t replace parts you don’t need.
Note: This guide is for a single-handle sink faucet (kitchen or bathroom) that drips from the spout or leaks around the handle. If you meant a single-handle shower/tub valve, the repair steps are different and may require opening a wall—pause here and follow your shower valve’s manufacturer instructions or call a plumber.
Quick Checks First
- Drips briefly after shutoff or flow is weak: clean the aerator first.
- Drips continuously from the spout: plan on a cartridge/valve service or replacement.
- Leaks around the handle/base: often seals/O-rings or cartridge area.
Safety rules before you start
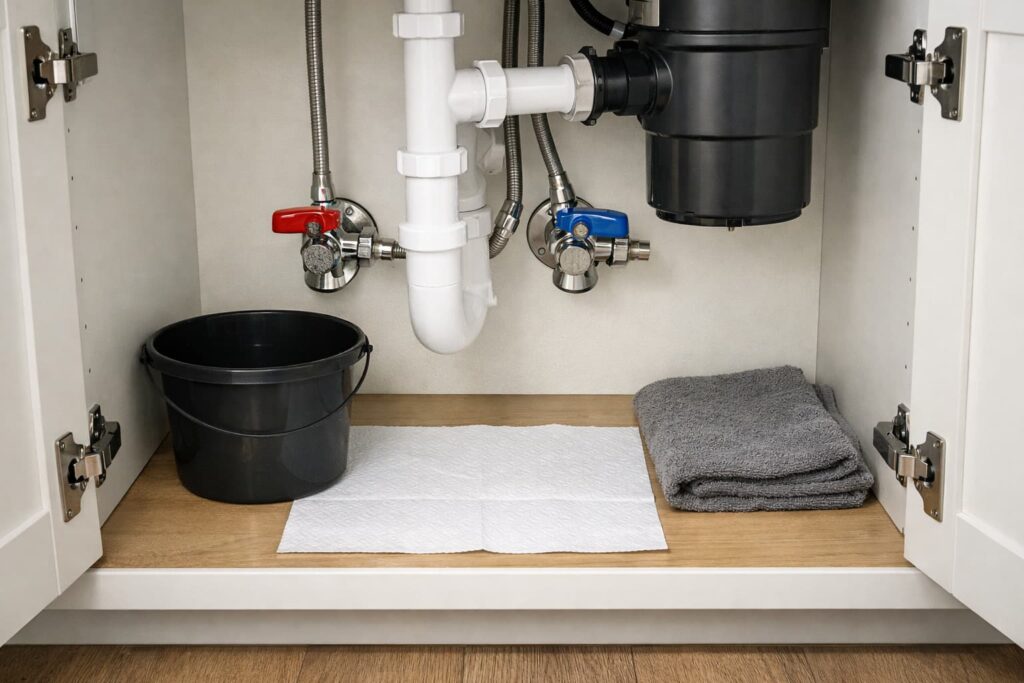
- Shut off both hot and cold under-sink valves before disassembly (single-handle faucets mix water internally). Use the shutoff-first approach shown in Kohler Assist — Replace the Valve in a Single Handle Faucet.
- Plug the sink drain (or lay a towel over it) so screws don’t drop down.
- Keep a small cup for parts in the order you remove them.
- If anything is corroded, go slow—forcing parts can turn a drip into a flood.
If there are no working shutoff valves under the sink: Don’t proceed with disassembly. Use the home’s main water shutoff only if you’re confident you can turn it off and back on safely; otherwise, call a plumber to replace/repair the angle stops first.
STOP / CALL A PRO
Stop and call a plumber if:
- The shutoff valves won’t close fully, won’t turn, or start leaking when touched.
- The leak seems to come from inside the wall, the cabinet back, or a supply line connection you can’t safely tighten.
- You see active spraying, cracking, or severe corrosion on valves/fittings.
Quick diagnosis: what kind of leak is it?
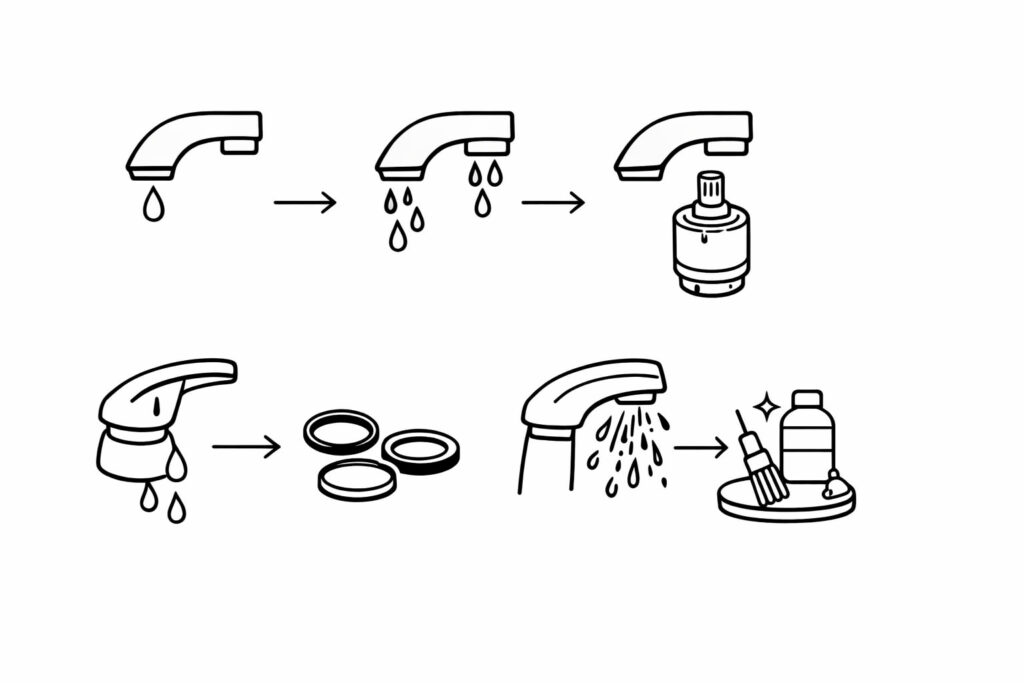
Leak from the spout (most common)
- Short drip after shutoff (then stops): often debris/mineral buildup at the aerator. See Kohler Assist — Leaking from End of Spout.
- Constant drip that doesn’t stop: usually the cartridge/valve needs service or replacement (same Kohler guidance above).
Kitchen faucet tip (pull-down/pull-out models): If you have a spray wand, check whether water is dripping from the spray head or if the hose connection under the sink is wet. A worn spray head seal, loose hose connection, or diverter issue can mimic a “spout drip.”
Leak around the handle/base
This often points to the cartridge area or seals (O-rings), especially if water appears around the handle when the faucet is on or right after shutoff.
Low flow + sputtering (especially after install or plumbing work)
Debris in lines is common; flush first using a manufacturer procedure like Delta Faucet — Proper flushing procedures for a new faucet.
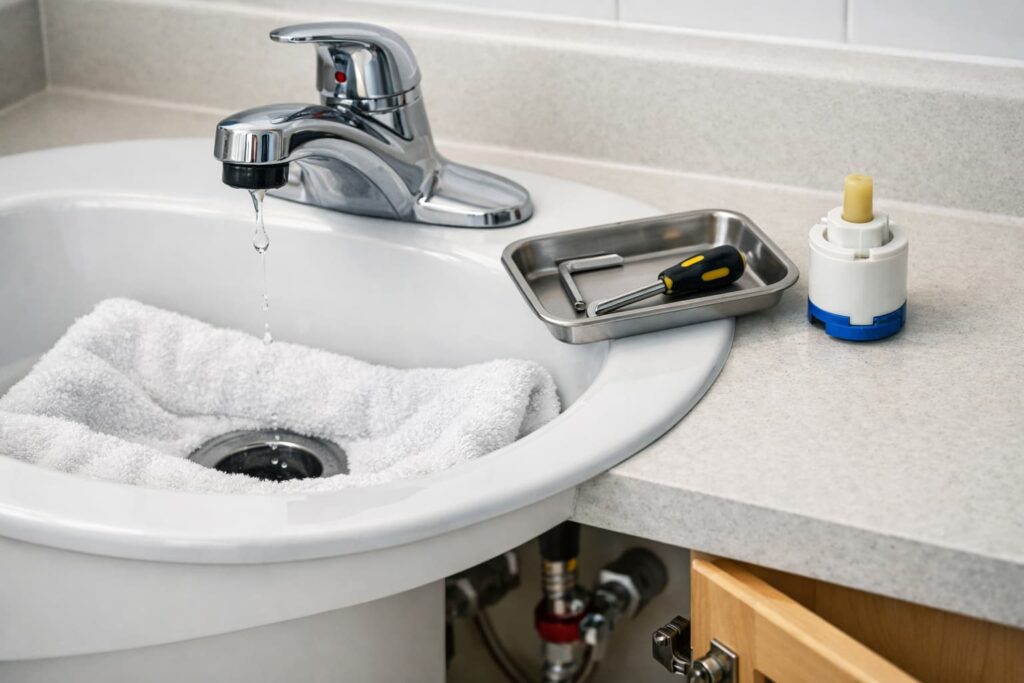
What you’ll need
- Hex key (Allen key) and/or screwdriver (varies)
- Adjustable wrench or slip-joint pliers (use a cloth to protect finishes)
- Old toothbrush, microfiber cloth
- White vinegar (only where your manufacturer allows it for aerator mineral buildup)
- Replacement cartridge (model-specific)
- Silicone-based plumber’s grease (only if recommended)
If you’re servicing O-rings, use the lubrication guidance from Moen Solutions — O-ring replacement steps (Moen warns against petroleum-based lubricants on rubber seals).
Before you buy parts:
- Find the faucet brand and model (or at least bring the old cartridge with you).
- Take a quick photo of the cartridge orientation before pulling it out—this makes reinstallation much easier.
- If you can’t identify the faucet, remove the cartridge first and match it exactly (shape, tabs, stem length).
Step-by-step: how to fix a leaky faucet single handle
Step 1: Shut off water and relieve pressure
- Close both hot and cold shutoff valves under the sink.
- Turn the faucet on briefly to relieve pressure and confirm water is off.
(That shutoff-first sequence is consistent with Kohler’s valve replacement steps.)
Step 2: Remove the handle
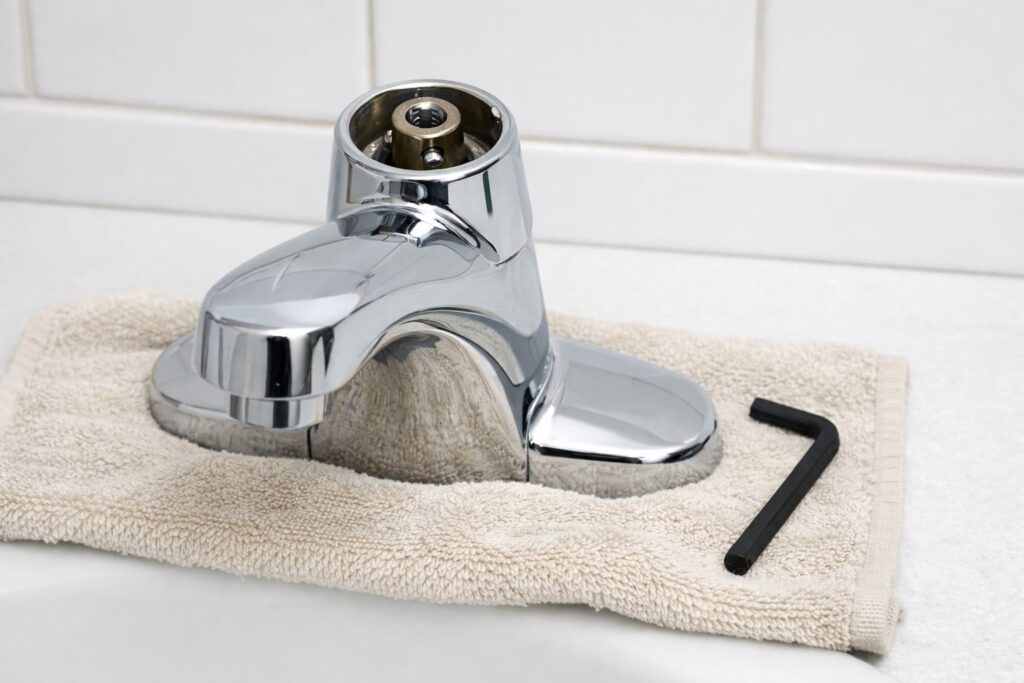
- Plug the drain or cover it with a towel.
- Pop off the handle cap/plug button (if present).
- Loosen the set screw or handle screw.
- Lift off the handle and remove trim as needed.
Step 3: Access and remove the cartridge/valve

- Remove the retaining hardware (bonnet nut, retaining ring, or clip—varies by brand/model).
- Pull the cartridge straight out (wiggle gently; don’t pry hard enough to crack plastic).
If the handle or cartridge is stuck:
- Double-check the set screw is fully loosened and the handle isn’t held by a hidden retaining screw under a cap.
- Mineral buildup can “glue” parts in place—work slowly and avoid prying hard against finished surfaces.
- Some brands use a cartridge puller tool for stubborn cartridges. If yours won’t budge with gentle wiggling, stop and look up your faucet’s brand-specific cartridge removal method (or call a plumber) to avoid cracking the valve body.
If you want a visual for the “handle off → retaining hardware → cartridge out” process, use this official-style walkthrough:
Why this helps: shows the real-world order of parts and how the cartridge comes out on a single-handle faucet.
Step 4: Inspect the cartridge area and decide: clean vs. replace
- Replace if you see torn seals, deep scoring, cracked plastic, or heavy wear.
- Clean only if the part looks intact and you suspect grit/mineral buildup is preventing a proper seal.
Best practice: If the leak was a steady drip, replacement is often the most reliable fix.
For a straightforward “remove and replace cartridge” sequence, see American Standard — How do I remove and replace a faucet cartridge?.
Step 5: Install the correct replacement cartridge (model matters)
- Match the new cartridge to your faucet model (or bring the old cartridge to match it).
- Install it in the same orientation as the old one.
- Reinstall the retainer/bonnet/ring/clip snugly—don’t over-tighten.
If you’re working with Moen parts, their cartridge servicing approach is outlined in Moen Solutions — 92451 Cartridge Service Kit Repair Guide.
Step 6: Clean the aerator (especially for short drips or low flow)

- Unscrew the aerator at the tip of the spout (some require a small tool).
If you don’t see an aerator: Some faucets use a recessed (hidden) aerator that sits up inside the spout tip and requires a small aerator key/tool. If the spout end looks smooth with no visible ring to grab, you may have a recessed aerator.
- Rinse and brush away grit.
- If mineral buildup is present, follow your brand’s guidance—Kohler describes an aerator soak method for end-of-spout leaking symptoms. (See Kohler Assist — Leaking from End of Spout.)
For a clear visual on aerator cleaning/replacement:
Why this helps: shows what to remove, what to rinse/brush, and how to reassemble the aerator correctly.
Step 7: Reassemble and test
- Put the handle and trim back on.
- Slowly reopen both shutoff valves.
- Run water and check:
- spout (drip after shutoff)
- handle/base (seepage)
- under-sink area (in case something got bumped)
Do one last 60-second check: With the cabinet dry, run hot then cold water while watching the shutoff valves, supply lines, and faucet connections underneath. If you see moisture forming at a valve stem or compression nut, stop and address it—small under-sink leaks can cause major cabinet damage.
Common mistakes that cause repeat leaks
- Not fully shutting off both supplies before disassembly
- Skipping aerator cleaning when debris is the real issue
- Using the wrong lubricant on seals (Moen warns against petroleum-based lubricants on rubber seals)
- Over-tightening retaining nuts/rings and damaging threads or seals
- Installing a “close enough” cartridge instead of the exact match
People Also Ask
Why is my single handle faucet dripping when turned off?
A brief drip may be aerator-related; a continuous drip often points to the cartridge/valve. See Kohler’s explanation in Kohler Assist — Leaking from End of Spout.
Do I need to replace the whole faucet?
Usually not—many leaks are fixed with a cartridge replacement and aerator cleaning.
Is a dripping faucet a big deal?
Yes—small drips add up. US EPA WaterSense — Fix a Leak Week notes that even a faucet dripping at 1 drip per second can waste thousands of gallons per year.
FAQs
1) How to fix a leaky faucet single handle if it only drips briefly after shutoff?
Clean the aerator first; mineral buildup and debris can contribute to end-of-spout leaking symptoms (Kohler Assist — Leaking from End of Spout).
2) How to fix a leaky faucet single handle that drips constantly?
Shut off water and replace the cartridge/valve with the correct model-matched part (Kohler’s valve replacement steps + American Standard cartridge steps).
3) How do I know if it’s cartridge vs. aerator?
Constant drip points to the cartridge; low flow/sputter or short post-shutoff drips often point to aerator/debris—flush/clean first (Delta flushing guidance + Kohler end-of-spout guidance).
4) Should I lubricate O-rings?
Only with what your manufacturer recommends. Moen advises silicone-based grease and warns against petroleum-based lubricants on rubber seals (Moen Solutions — O-ring replacement steps).
5) What if the shutoff valves won’t close fully?
Stop and call a plumber—removing a cartridge without reliable shutoffs can cause flooding.
6) Why did the leak start after I installed a new faucet?
Debris in the lines is common after work; follow a proper flush procedure (Delta Faucet — Proper flushing procedures for a new faucet).
Conclusion
Fixing a single-handle faucet leak is usually a manageable DIY: shut off water, access the cartridge, replace/clean it as needed, and clean the aerator if flow or debris is involved. Work slowly, keep parts in order, and don’t push past stuck shutoffs or corroded fittings—those are the moments when calling a pro prevents water damage.
Sources / References
- Kohler Assist — Replace the Valve in a Single Handle Faucet
- Kohler Assist — Leaking from End of Spout
- American Standard — How do I remove and replace a faucet cartridge?
- Moen Solutions — 92451 Cartridge Service Kit Repair Guide
- Moen Solutions — O-ring replacement steps
- Delta Faucet — Proper flushing procedures for a new faucet
- US EPA WaterSense — Fix a Leak Week