

Dishwasher high loop installation is routing the drain hose up high (usually to the underside of the countertop) before it drops to the drain connection to help reduce siphoning/backflow and improve draining. If your local plumbing rules allow it, follow your dishwasher’s installation manual for the exact routing height and connection method.
High loop vs air gap (important: local code wins)
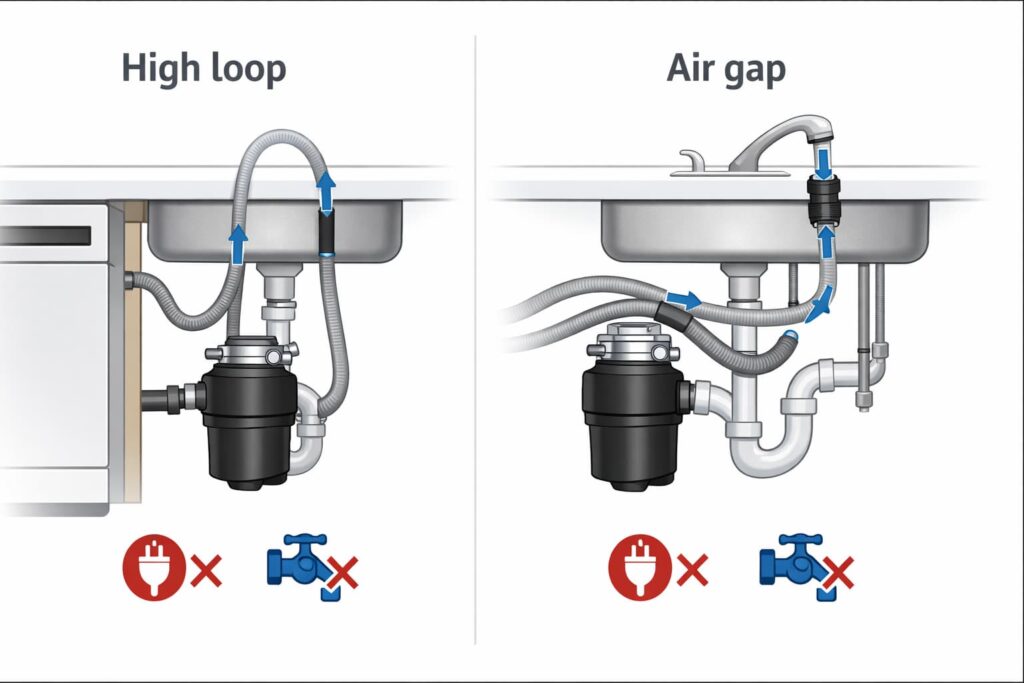
Many dishwasher installation guides allow a high loop or an air gap, but some jurisdictions require an air gap device. Bosch’s installation instructions explicitly say the drain hose must be installed with either a high loop or an air gap and include minimum height guidance (see Bosch Installation Instructions (PDF)).
Some plumbing-code guidance (UPC-focused) emphasizes use of an approved dishwasher air gap in certain setups (see IAPMO eOfficial – Uniform Codes Spotlight).
Bottom line: If your local code/inspector requires an air gap, install one. If not, a properly secured high loop is commonly permitted by manufacturers.
Quick way to confirm what your area requires (30 seconds): Look under your sink for an existing air gap (small fitting on the sink/counter with two hoses underneath). If you don’t have one, check your dishwasher’s installation guide and your local plumbing guidance (or ask your building department/inspector) before you assume a high loop is enough. When requirements conflict, local code/inspection requirements come first.
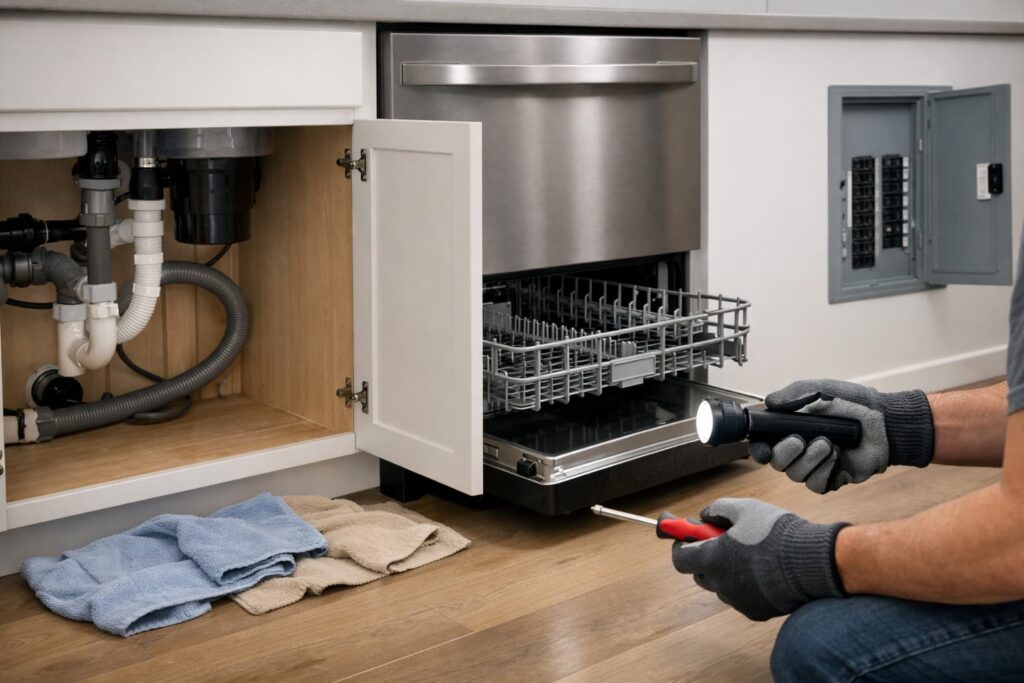
Safety first (non-negotiable)
- Turn power OFF at the breaker (or unplug if accessible).
- Shut water OFF at the dishwasher supply valve (usually under the sink).
- Keep the cabinet floor dry while working.
- Stop and call a pro if you see damaged wiring, repeated sink/disposal backups, active leaks you can’t stop, or you’d need to modify drain plumbing/vents.
Tools and supplies (keep it simple)
- Flashlight + work gloves
- Screwdriver (toe-kick/access panel on some installs)
- Pliers/nut driver (for hose clamps)
- Drain hose strap/clip/hanger (often included)
- Hose clamp(s) if your connection needs one
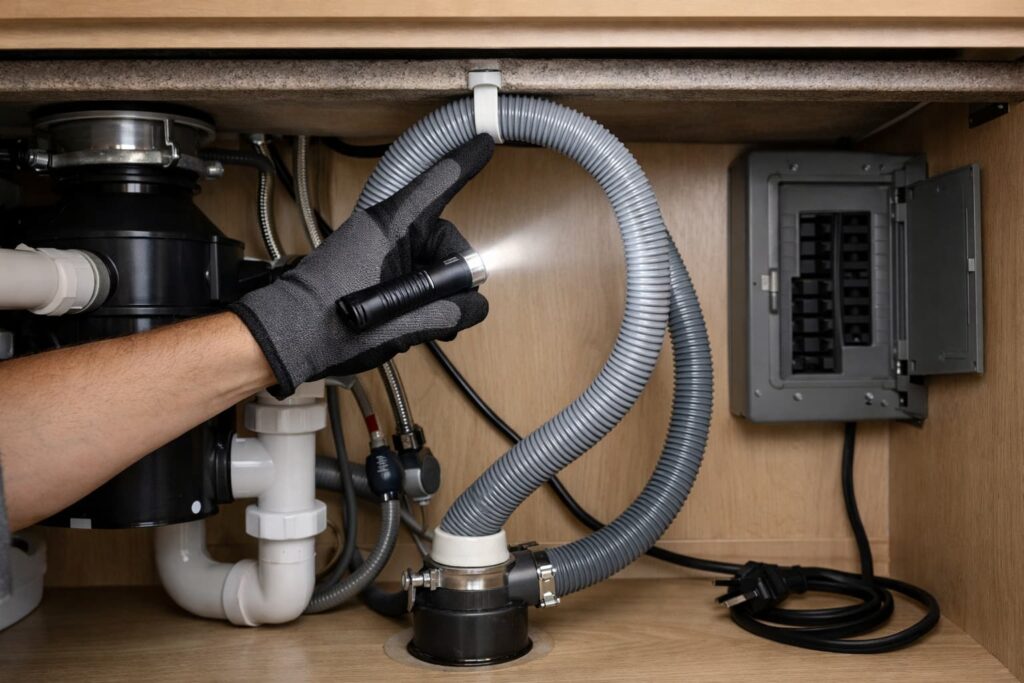
What a correct high loop looks like
A correct high loop is a smooth “up-and-over” route inside the sink cabinet:
- Dishwasher drain hose enters sink cabinet
- Hose rises as high as practical (typically near the underside of the countertop)
- Hose is secured so it can’t sag later
- Hose then drops down to connect to the disposer or drain tee (or to an air gap if required)
Whirlpool’s drain line guidance explains the high loop concept and stresses avoiding kinks and testing after install (see Whirlpool – Drain Line Installation).
Step-by-step: dishwasher high loop installation
Step 1: Identify your drain connection point
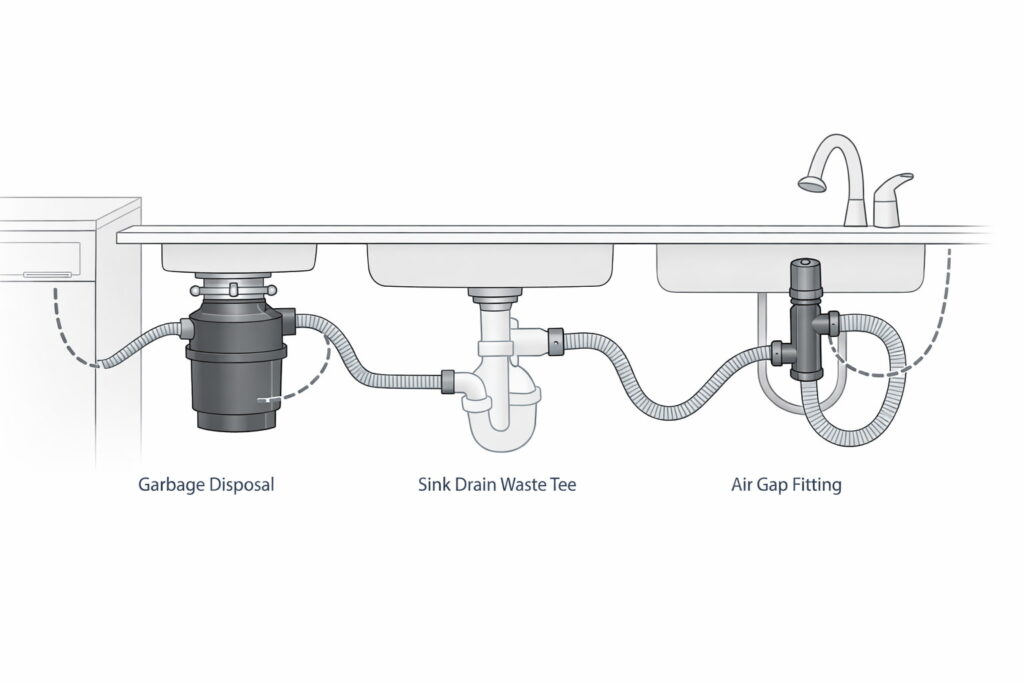
Under the sink, you’ll typically connect to one of these:
- Garbage disposal dishwasher inlet (small nipple on the disposer)
- Sink drain/waste tee branch connection
- Air gap fitting at the sink/countertop (if required)
Tip: No matter which connection you have, the goal is the same: the hose should rise high and stay secured, then drop smoothly to the connection—without extra humps or low sagging sections that trap water.
Step 2: Prevent the #1 “won’t drain” mistake (disposer plug)
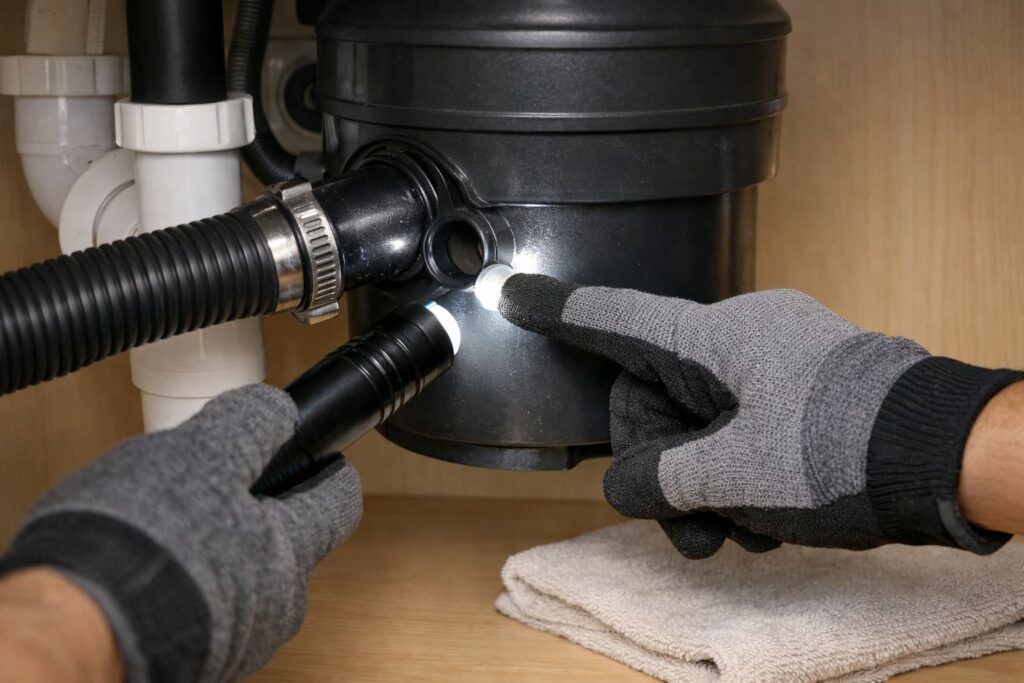
If you’re connecting to a garbage disposal, confirm the dishwasher inlet knockout plug inside the disposer was removed. If it’s still there, the dishwasher can’t drain.
(Manufacturer installation instructions commonly include this warning; for an example install set, see GE Built-In Dishwasher Installation Instructions (PDF).)
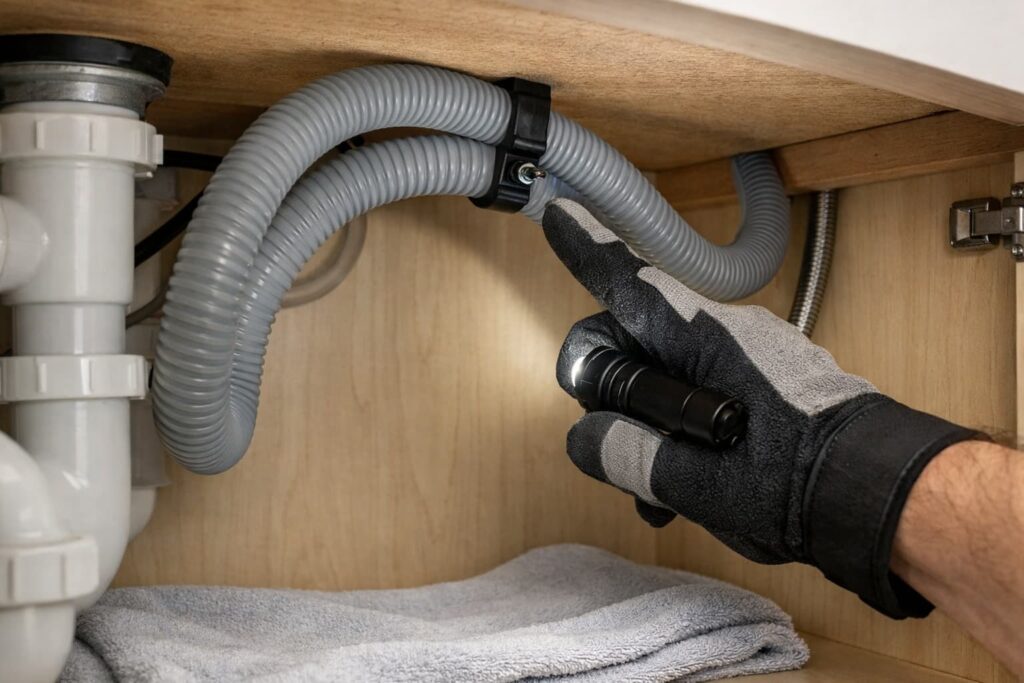
Step 3: Fix routing problems before you make the loop
Check the hose path for:
- Kinks or crushed sections
- Sharp bends
- Low “sags” that can hold dirty water
Re-route gently so the hose runs smoothly without pinching.
Step 4: Form the high loop (route the hose up high)
Inside the sink cabinet:
- Pull enough slack so the hose can rise without tension.
- Route the hose up high (near the underside of the countertop).
- Keep the “up-and-over” curve smooth (no tight turns).
If the hose passes through a cabinet wall: Make sure the edge of the hole can’t rub or cut the hose over time. If the hole is rough or tight, smooth the edge or use a protective bushing/grommet so the hose doesn’t chafe.
Follow your manual’s height guidance. One example: Bosch calls for a portion of the drain hose to be at least 33 inches (84 cm) off the floor for proper draining.
Step 5: Secure the loop so it stays high
This is the difference between “works long-term” and “sags later.”
If you can’t (or shouldn’t) screw into the countertop: Secure the high loop to the upper side wall of the sink cabinet or a sturdy cabinet brace as high as possible. The key is keeping the hose high and supported so it won’t sag.
- Strap/clip the hose to the underside of the countertop (or high on the cabinet wall).
- Secure it firmly but don’t crush the hose.
Avoid a common DIY mistake: Don’t crush the hose flat with a strap, and don’t “trim” or modify the corrugated portion of the hose unless your specific installation manual explicitly allows it. A pinched or altered hose can reduce flow and cause slow drains or backups.
If your dishwasher includes a factory high loop, don’t remove or defeat it. Some brands note that extra high-loop routing is in addition to the built-in design (see Cove (Sub-Zero/Wolf) – High Loop Drain).
Step 6: Connect to the drain and clamp correctly
A) Garbage disposal connection
- Push the hose fully onto the disposer inlet.
- Install/tighten the clamp securely.
- Reconfirm the disposer plug is removed.
B) Waste tee (sink drain) connection
- Push the hose fully onto the tee branch.
- Clamp securely.
- After the high loop, the hose should slope down to the connection (avoid a second “hump”).
C) Air gap (if required)
- Follow the air gap device instructions and your dishwasher manual.
- You’ll route one hose from dishwasher to air gap and a second from air gap to disposer/tee.
Step 7: Quick final checklist
- ✅ High loop is as high as practical and secured
- ✅ Hose isn’t kinked/crushed anywhere
- ✅ All clamps are snug and properly positioned
- ✅ No tension on the hose when the cabinet door closes
- ✅ Dishwasher can slide fully back in without pinching/crushing the drain hose behind it
Step 8: Test for leaks and good draining (short cycle)
- Turn water back on.
- Restore power.
- Run a short cycle and watch under the sink during fill and drain.
- Check for drips at clamps and for strong draining near the end.
If anything leaks, stop the cycle, shut water off, and correct the connection/clamp.
Video help (only if you want a quick visual)
This helps you visualize where the high loop should sit under the sink and why securing it high matters.
Troubleshooting: symptom → likely cause → safe check → next step
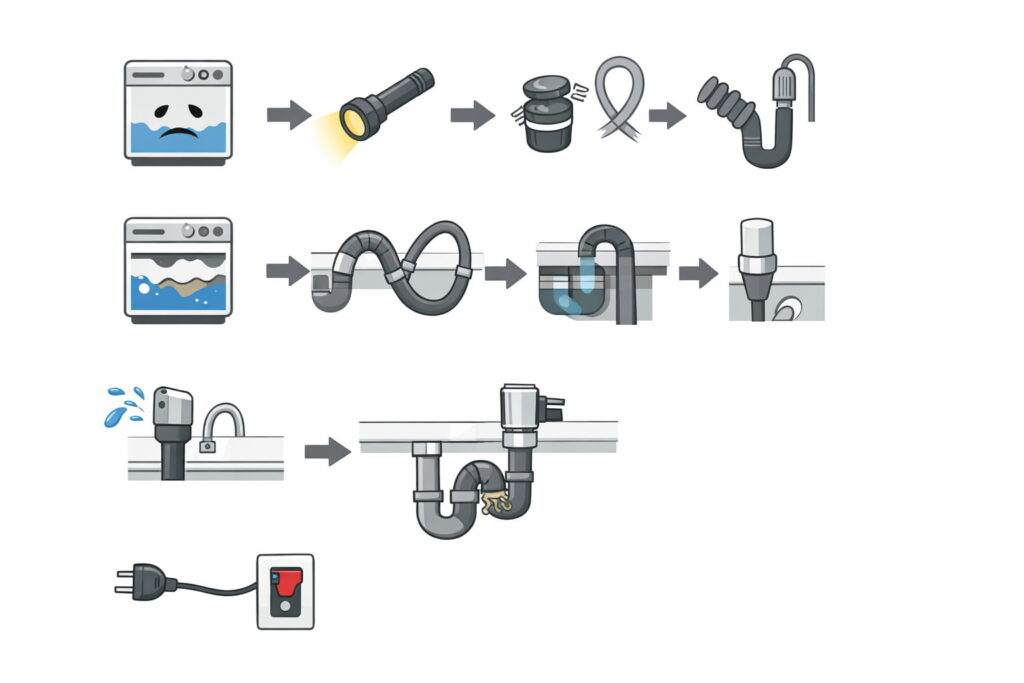
Dishwasher won’t drain (water left in the tub)
- Likely causes: disposer plug still in; kinked hose; loop too low/sagging.
- Safe check: confirm disposer plug removal (if applicable), inspect for kinks/sags, confirm the loop is secured high.
- Next step: re-route and re-secure, then run a short test cycle again.
This video is useful for recognizing drain-routing mistakes that commonly lead to poor draining.
Sink/disposal backs up and dishwasher smells or gets dirty water
- Likely causes: drain backup path + low/sagging hose routing; code-required air gap missing in some areas.
- Safe check: confirm the hose rises high and stays secured; confirm you’re compliant with local requirements (air gap if required).
- Next step: correct routing; if local rules require an air gap, install one.
This explains what an air gap does so you can choose the right setup if your area requires it.
Water spurts out of the air gap (if you have one)
- Likely causes: partial blockage in the hose run, disposer inlet, or sink drain; kinked hose; heavy buildup in the drain path.
- Safe check: inspect for hose kinks and confirm the drain path (to disposer or drain tee) isn’t blocked.
- Next step: clear the blockage in the sink/disposer drain path first (since the air gap is usually “warning you” the drain side is restricted). If you can’t clear it safely or backups keep happening, call a plumber.
Common mistakes to avoid
- Not securing the loop (it sags later and stops being “high”)
- Leaving the disposer plug in place
- Kinking/crushing the hose behind the dishwasher or inside the cabinet
- Adding a second hump after the loop that traps water
- Ignoring local requirements when an air gap is required
Stop and call a pro if…
- You’re unsure whether local code requires an air gap
- You need to modify drain plumbing/vents to make the dishwasher drain
- You have repeated backups, leaks that won’t stop, or water damage inside cabinets
- There’s any electrical issue (wet junction box, damaged cord, breaker trips)
FAQs
1) What is dishwasher high loop installation?
It’s routing the dishwasher drain hose up high (often to the underside of the countertop) before it drops to the drain connection to help reduce backflow/siphoning issues.
2) Is a high loop the same as an air gap?
No. A high loop is a routing method; an air gap is a device. Some areas allow a high loop, while others require an air gap—local rules come first.
3) How high should the drain hose loop be?
Follow your dishwasher’s installation manual. Some manufacturers specify minimum routing height guidance (for example, Bosch references a minimum height for a portion of the hose).
4) Why does my dishwasher not drain after I hooked it to the disposal?
A common cause is the disposer’s dishwasher inlet plug wasn’t removed. If that plug is still in place, water can’t exit the dishwasher.
5) Can a low/sagging drain hose cause smells?
Yes. A sag can hold dirty water, which can contribute to odor and backflow symptoms. Securing the hose high helps.
6) When do I need an air gap instead of a high loop?
If local code or your inspector requires it—or if your manufacturer specifies it for your installation—use an air gap.
7) Should I still route a high loop if my dishwasher has a factory high loop?
Often yes, you still route and secure the hose properly in the cabinet. Don’t remove or defeat the factory routing.
Conclusion
Dishwasher high loop installation is a small routing change that can make a big difference in drainage reliability—as long as you install it safely, secure it high, and follow local requirements. Route the hose up high, strap it so it can’t sag, avoid kinks, confirm the disposer plug is removed (if applicable), and always run a short leak/drain test afterward.